Earth day was last Saturday, but our Earth is so precious that I feel it should be celebrated more that once a year.
I like to do something every day to help preserve our precious planet.
Now, I am not a tree hugging hippie, I am person who is consciousness of the wonderful resources we have been given.
It is partly why I have started to switch to homemade non toxic cleansers. I have talked about laundry and dishwasher detergent, but there is more.
There are so many things you can make, you will never have to buy a commercial cleaner again.
Next week I plan to talk about green cleaning parties! But green cleaning isn't the only think we can do to help conserve our planet's resources.
This year for Earth Day I decided I would try to to get our worm box to operate at full potential. I checked out from my local library, Worms Eat My Garbage, by Mary Bppelhof.
In our worm box, we have the expectation to be able to harvest worm casting for our house plants and the garden.
We re-established our worms a month or so ago. We moved the box into the kitchen, for easier access. I love that is it so close, but hate that it is taking up space...
I am a fan of home composting, and over then next few months I will talk about our worms and how they are doing.
Monday, April 30, 2012
Thursday, April 26, 2012
Washing Dishes, Can Be Fun?
We used to buy:

When you go to the store you have an isle full of different types of dishwasher detergent. According to Amazon.com there are 675! But how do they compare to making it your self?
Packets (Prices are from Amazon, non-sale price):
Cascade, 85 count: $18.47 / 85 loads = $0.217
Finish, 85 count: $34.19 / 85 loads = $0.402
Seventh Generation, 20 count: $12.27/ 20 loads = $0.613
Powder (Assume you use 2 oz per load):
Cascade, 75 oz: $5.15 / 38 loads = $0.135
Finish, 150 oz: $15.57 / 75 loads = $0.207
Seventh Generation, 45 oz: $8.99 / 23 = $0.391
Gel (Assume you use 2 oz per load):
Cascade, 45 oz: $4.54 / 23 = $0.197
Finish, 75 oz: $6.99 / 38 = $0.184
Seventh Generation, 42 oz, $8.99 / 21 = $0.428
$0.20 per load is not that bad. But how much is it to make my own? (Prices are what I paid for at my local grocer)
Borax, 4 pound box, $4.28
Washing Soda, 3.5 pound box, $3.17
Epsom Salt, 4 pound box, $3.24
Citric Acid*--$0.59 per ounce (you will need about 3 oz)
* There are a few options here. 1) use unsweetened lemonade drink mix, like kool-aid, 2) use Fruit Fresh Produce Protector made by Ball, found in the canning isle, or 3) find food grade citric acid powder. I used the Fruit Fresh, until I found Citric Acid at my local health food store in their bulk section.
You will need to know a couple things before you should make this...
#1: Is your water HARD or SOFT?
#2: What type of RISE AID are you using?
#3: Are you prepared to blow your friends away with how awesome you are because you are saving money in ways they don't think about?
#1) I have SUPER hard water. If we owned a house, we would invest in some sort of hard water treatment, but we don't. I started looking at at ways to help remove the hard water spots on our dish, when I came across making your own dish detergent.
#2) For rinse aid, I had been using Jet Dry liquid, until I figured out that the dispenser in the washer doesn't dispense the liquid... So I tried the Jet Dry solid rinse aid. Work alright until I heard about this:

#3) My friends think I am crazy. Even my frugal mother in law, thinks I am crazy. But you know what, I am saving money on the cleaning products! And that makes me feel good, and my house toxic chemical free!
I have told you about how great this detergent is, so here is how to make it followed by the cost run down.
Step One: Measure 1 cup BORAX, 1 cup WASHING SODA, 1/2 cup CITRIC ACID and 1/2 cup EPSOM SALT (For softer water use 1/4 cup Epsom Salts)
Step Two: Put all ingredients into an air tight container (I like to use an old glass jar, Adams' Peanut Butter Jars are my favorite jars right now!)
Step Three: Mix, by closing the container and shaking
Step Four: Use 1 TBSP per load of dishes
I am not sure, but I think I could have added a few more steps!
Cost:
Out of a box of Borax you should get about 9 cups, from the Washing Soda about 7, and from the Epsom Salts about 9 cups.
Borax: $4.28 / 9 = $0.48 per cup
Washing Soda: $3.17 / 7 = $0.45 per cup
Epsom Salts: $3.24 / 9 = $0.36 per cup
I used about 3 ounces of citric acid which cost about $2.
For a total of $3.29!
You get 3 cups of detergent with this, and with 16 tablespoons in cup that makes for 48 loads. In other words you use ONE TABLESPOON a load!
$3.29 / 48 = $0.068
6 CENTS A LOADS!!!
This are very important, please don't gloss over yet!
Use a good rinse aid!--Like, I said above, I use the LemiShine and a rinse aid. When using this detergent, if you do not use the LemiShine you will get a film on plastic. It will rinse off, but adding the LemiShine will solve the problem. (LemiShine $3.66 for 12 oz, 0.5 oz per load (1 tbsp), cost 15 cents a load.)
Use 1 TBSP detergent!--American's has a soap fetish, we really do not need to use as much soap as we do. Put one TBSP detergent in your open soap dish, and 1 TBSP into the dispenser that closes (it is a rinse aid).
If it gets hard-- DON"T WORRY. It is just the citric acid. Take a spoon and break it up. Next time, or now, try using a air tight container (like a glass jar with screw on lid). Or let is sit open on the counter for a few days stirring it every so often.
Wednesday, April 25, 2012
Moved in, Now What?
I am finished with the craft nook! And have moved everything back in. Everything is set back up, and I am only waiting to paint the desk and to move my fish tank in. I am evening writing this while sitting in the finished place!
 |
| Before the Re-model |
 |
| Wonderful Man hanging the shelves |
 |
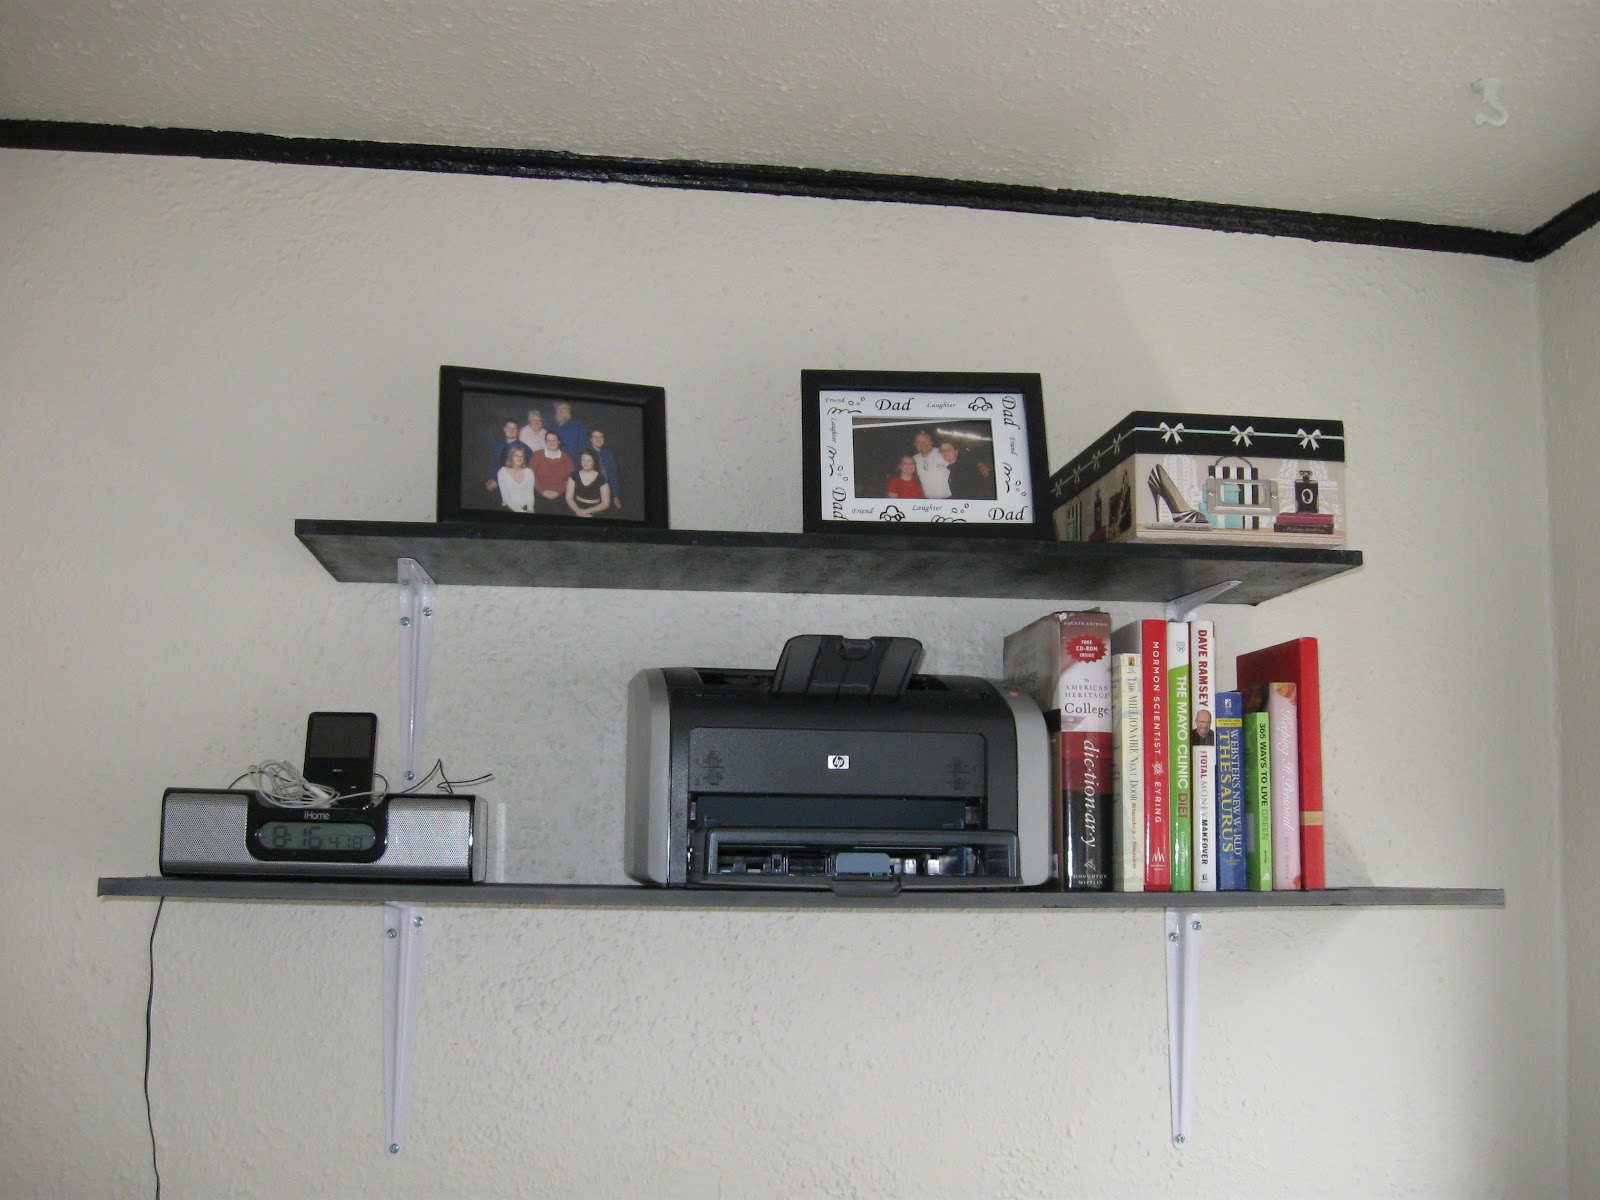
| Shelves! |
 |
| Sewing stash. Needs some organization... |
 |
| DIY Roman Shade! |
 |
| Shade closed! |
 |
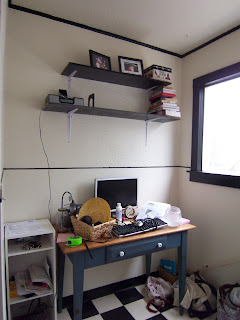
| Desk area finally put together, and clean! |
 |
| The wall of craft stuff! The fish tank will going here also. |
Tuesday, April 24, 2012
Laundry, a Beast that never Dies!
I HATE LAUNDRY!!! The only things I hate more than doing laundry is deep cleaning the fridge and the bathroom!
For Thrifty Thursday, I talked about making laundry soap, and with that I decided I should add doing laundry to our Week To Clean list.
Do you have a routine for doing laundry?
I do, only because it wasn't getting done, until I figured out this prescription...
Do 1 or 2 loads a day to keep the Beast at bay!
Seriously, I am a laundry nazis and only a year ago did i figure out that secret. Maybe it stems from growing up with chore Saturdays, or maybe from 3 years of sharing one washer and dryer with 50 other co-eds.
Here is how I do laundry, one or two loads a day, over two weeks.
Week one is clothes, whites, colors, reds, darks, and jeans. Week two, is towels, and bedding (including all those blankets Wonderful Man loves to wrap up in ALL THE TIME!!!)
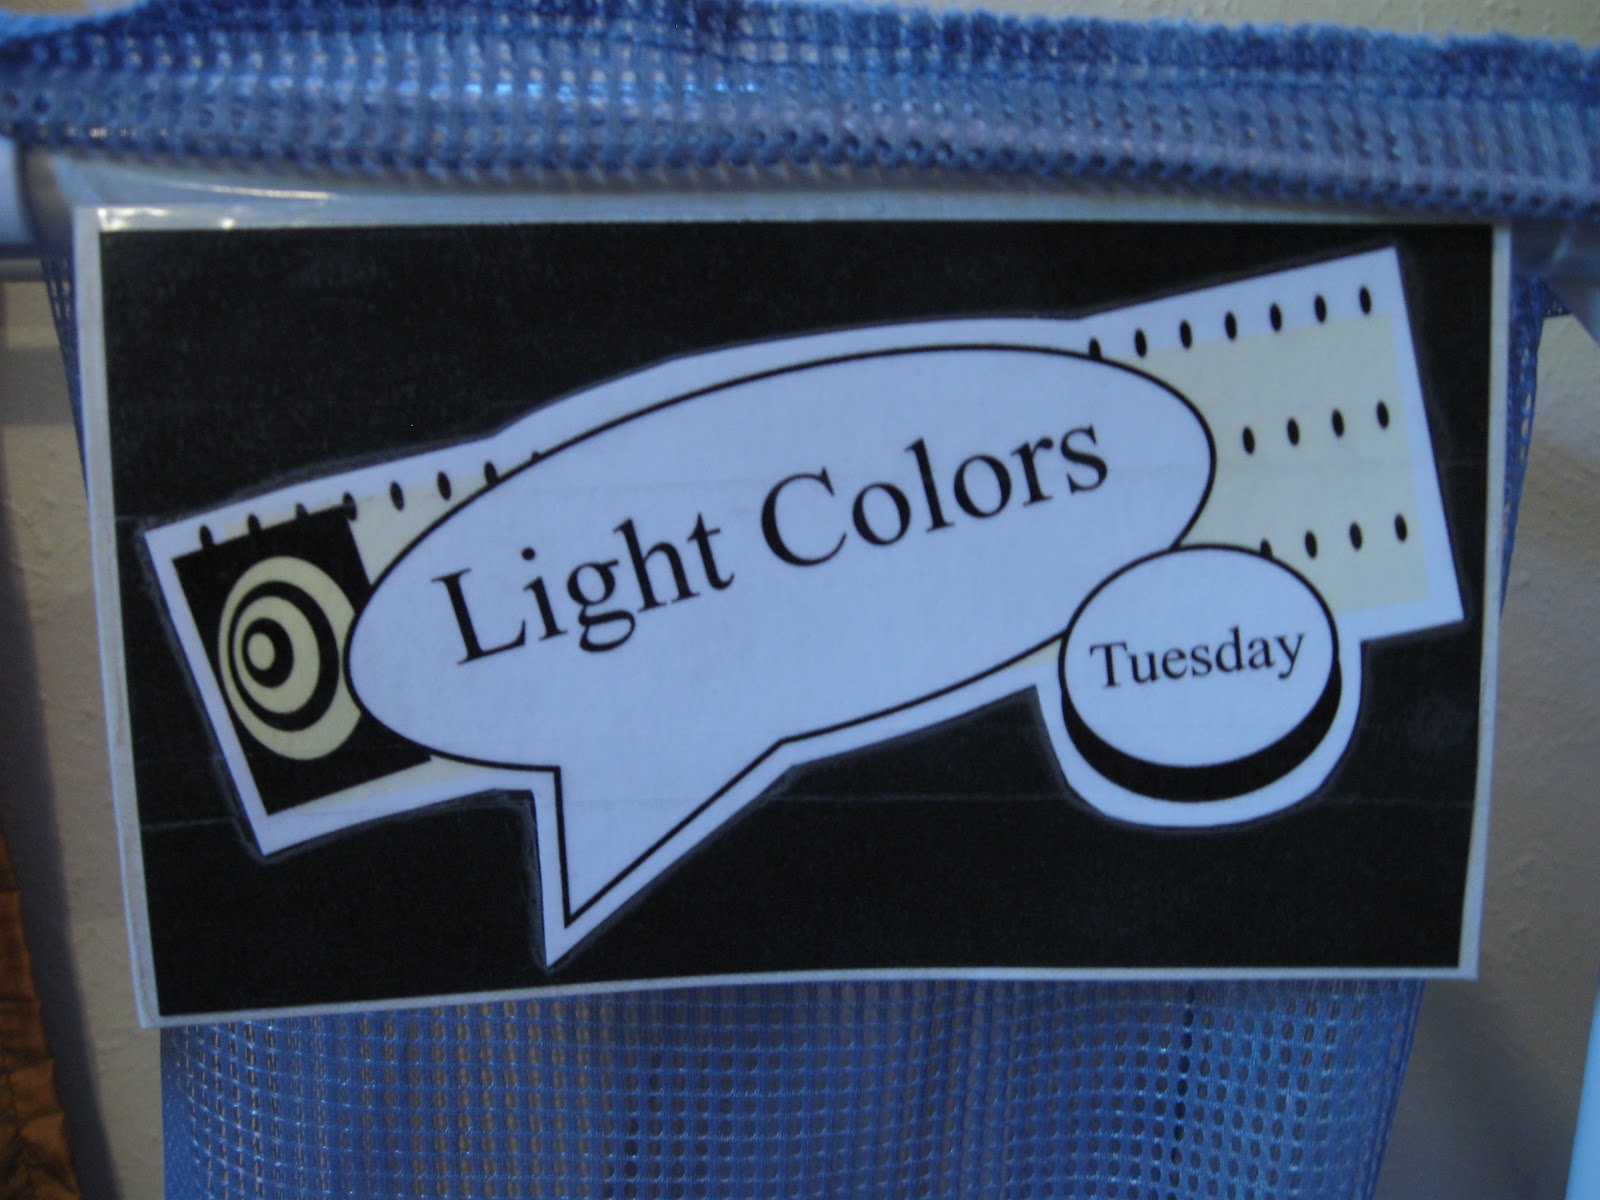
By doing only one or two loads a day, that means I only have one or two loads to FOLD and PUT AWAY!!! It keeps me sane, because there is not multiple piles of clean clothes hanging around the house. We also PRE-SORT our clothes. We got two of those multiple bag hampers. I made after we got them some signs to help out Wonderful Man.

Plus I feel that doing one or two loads a day is manageable especially if you have kids running around, or you work out of the house.
For Thrifty Thursday, I talked about making laundry soap, and with that I decided I should add doing laundry to our Week To Clean list.
Do you have a routine for doing laundry?
I do, only because it wasn't getting done, until I figured out this prescription...
Do 1 or 2 loads a day to keep the Beast at bay!
Seriously, I am a laundry nazis and only a year ago did i figure out that secret. Maybe it stems from growing up with chore Saturdays, or maybe from 3 years of sharing one washer and dryer with 50 other co-eds.
Here is how I do laundry, one or two loads a day, over two weeks.
Week one is clothes, whites, colors, reds, darks, and jeans. Week two, is towels, and bedding (including all those blankets Wonderful Man loves to wrap up in ALL THE TIME!!!)
By doing only one or two loads a day, that means I only have one or two loads to FOLD and PUT AWAY!!! It keeps me sane, because there is not multiple piles of clean clothes hanging around the house. We also PRE-SORT our clothes. We got two of those multiple bag hampers. I made after we got them some signs to help out Wonderful Man.
Plus I feel that doing one or two loads a day is manageable especially if you have kids running around, or you work out of the house.
Week to Clean:
Focus Cleaning Days:
Monday: Kitchen
Tuesday: Bedrooms
Everyday Clean Tidying:
KITCHEN:
Load and run Dishwasher
Wash remaining dishes by hand
wipe down the counter, range/stove top, sink
Sweep floor
BEDROOM:
Make the bed
Pick up clothes
Put away toys
Clear off dresser
Take glasses to kitchen
LAUNDRY:
Run one or two loads
Fold and put away clean clothes
Monday, April 23, 2012
Monday Musing: Spirituality
This weekend I had the opportunity to attend Time Out For Women (TOFW). It is kind of like a women's retreat filled with spiritually uplifting speakers and music. It is sponsored by Deseret Book, the book store for The Church of Jesus Christ of Latter-Day Saints.
It was wonderful! Now, if you haven't already guessed I am a Mormon, but I NEVER want to push it into someone's face. I also don't want to be another one of those Mormon Bloggers. But spirituality and faith are a big part of my life, and this conference was so wonderful I HAVE to tell you about it!
Friday night, there were two speakers. The first speaker spoke about what you surround yourself in and how it can affect you. "Regardless of your original intent, you will eventually become what you surround yourself with."-John Bytheway
The second speaker spoke about the importance of names. He specifically spoke about the importance of the multiple names giving to Jesus. "Remember His name. Just as you know His names, he knows yours!"- Brad Wilcox
Saturday, was a long session with SIX speakers! The theme of TOFW was Seek the Good, "And whatsoever ye do, do it HEARTILY..." Colossians 3:23
Chris Williams spoke about how he over came horrible tragedy. Here is a link to his story.
Kris Belcher spoke about listening and NEVER EVER giving up.
Hilary Weeks spoke about focusing on the good in life. Counting the good, will allow us to be a happier person, whereas focusing and counting all the bad, will lead us to despair.
S. Michael Wilcox spoke about how we need to search for the good, lay hold of it, and cleave unto it. (Moroni 7)
Merrilee Boyack, was one of my favorites. She spoke about taking moments to do good. Service doesn't not have to be something big huge and extravagant. It can be as simple as being nice to the cashier at the store! Something I really need to work on!
The last speaker was Emily Watts, and this was my favorite! She gave five tips for life with 5 questions to ask. Tip number four really hit home, Good takes Patience! with the question: If good takes patience, how can I increase my trust in the Lord?
I had lots of fun at TOFW, and I hope to be able to go again. I cried and grew, and cried some more. Most of all this weekend, I reaffirmed my love and gratitude for my Savior.

Thursday, April 19, 2012
Laundry, Thrift Style
I have been a laundry Nazis since I learned how to do laundry, at around age 12. No joke! Just ask some of my college roommates or floor mates. Two hour laundry slots did not work for me. I am very particular about what clothes get washed with what, or how clothes get washed. And I used to be very particular about what laundry detergent I used. When I went to college and could start buying my own laundry soap, I tried everything the stores had to offer. DISLIKED them ALL! Then I discovered this wonderful soap
 |
| From biokleen |
No, not the Biokleen liquid soap, I make my own Laundry Soap! and I LOVE IT! Just as much as the Biokleen!
 |
| My Laundry Soap and scoop! |
So here is the recipe:
Small batch (makes about 4 cups or 64 washes)
1 cup borax
1 cup Super Washing Soda
1 cup Oxi-Clean
1 bar Fels-Naptha or Dr. Bronner's Hemp Pure Castile soap
Large Batch (make enough to fill a 5 gallon bucket! Which is about 960 washes!)
2 boxes Borax (4 lbs each)
2 boxes Super Washing Soda (55 oz each)
2-3 pound tubs of Oxi-clean
6 bars Fels-Naptha or Dr. Bronner's Hemp Pure Castile soap
Grate the soap, like you would cheese.
Place all the ingredients into a container (an old spaghetti sauce jar works great for the small batch)
Shake or stir until combined.
Use ONE TABLESPOON per load.
 |
| Large Batch Laundry Detergent |
It is that easy! The small batch lasted us about 6 months. I loved this stuff so much that I just made a large batch that I just have to scoop some into my container to refill. I am hoping that it will last a good 3 years. I will let you know when we run out!
But making your own stuff, is it really cost efficient? Well, here is the run down: (Prices from my local grocer where I purchased the items)
Borax- $4.28 per box
Super Washing Soda- $3.17 per box
Oxi-Clean- $7.47 per tub
Fels-Naptha bar- $0.97
Dr. Bronner's Bar- $3.95
$4.28 x 2 = $8.56
$3.17 x 2 = $6.34
$7.47 x 2 = $14.94
$0.97 x 6 = $5.82
$3.95 x 6 = $23.70
Using Fels-Naptha: $35.66 / 960 loads = $0.037 cost per load
Using Dr. Bronner's Castile soap: $53.54 / 960 =$0.056 cost per load
So making your own laundry soap comes to about 4 cents a load. So how does that add up to store bought? (prices from Amazon, non-sale price)
Gain
Powder: $47.37 / 150 loads = $0.315
Liquid: $73.24 / 192 loads = $0.381
All Free and Clear
Powder: $22.99 / 80 loads = $0.286
Liquid: $21.73 / 64 loads = $0.339
Tide
Powder: $48.04 / 120 loads = $0.400
Liquid: $75.10 / 144 loads = $0.521
Arm & Hammer
Powder: $39.33 / 215 loads = $0.183
Liquid: $24.12 / 50 loads = $0.482
WOW! The cheapest detergent was still $0.14 more per load! I am sold! I hope you are too!
But that is not all! If you had read this far I have to give you some EH advice!
Have you ever forgotten about a load of laundry? Well, I have, many times! I have two options for you on how to get that musty smell out.
1. Start the washer as normal, add your regular amount of detergent PLUS 1 cup BAKING SODA and 1 cup VINEGAR (white distilled). Wash as normal.
2. In the hottest water the load can handle, soak for 1hour with 1 cup Borax. I put the borax in with the running water, let the machine swish for about 10-15 minutes and then I turn if off to soak of an hour. Then you drain the water and wash as normal.
Wednesday, April 18, 2012
Oh! It is done!
That is right the nook is finished! But have I moved back in?
NOPE!
And the curtain isn't done yet... I really need to do that.
In the mean time, here are some pictures for what has happened.
 |
| My wonderful Husband hanging the shelves for me |
 |
| Here are the shelves and the desk |
 |
| The shelves are all put together, but is the only thing done... |
 |
| The beginning of my craft stash/wall... |
Tuesday, April 17, 2012
A Week to Clean, Day Two: The Bedroom
Oi! It has been TOO long since I talked about our little Week to Clean plan! Today, we will focus on the bedroom.
This room, although it is mainly for sleeping, or in my house, quiet alone time. (When you have only one actual room you take what you can get!) We do a lot of in and out things in the room.
If you do laundry, in to get the clothes, in to put them a way. If you get need to get a pair of shoes, some jewelry, your phone of the charger... You get the idea. Think about how often you go in and out of your bedroom a day? It is a decent amount!
If you are going in and out of a room on a regular basis and the room is a disaster, it alters your mood a little. Like when the kitchen is a mess and you are trying to make dinner!
I don't feel like I need to go into a step by step how to clean a bedroom, so here is your list of what to do:
It doesn't seem like a whole lot, and I am thinking, I must have forgotten some thing big! But I have walked through my room 6 times now thinking about that else I do... So if there is something I missed please let me know!!
This room, although it is mainly for sleeping, or in my house, quiet alone time. (When you have only one actual room you take what you can get!) We do a lot of in and out things in the room.
If you do laundry, in to get the clothes, in to put them a way. If you get need to get a pair of shoes, some jewelry, your phone of the charger... You get the idea. Think about how often you go in and out of your bedroom a day? It is a decent amount!
If you are going in and out of a room on a regular basis and the room is a disaster, it alters your mood a little. Like when the kitchen is a mess and you are trying to make dinner!
I don't feel like I need to go into a step by step how to clean a bedroom, so here is your list of what to do:
Tuesday: Bedrooms Day!
Things to be done EVERY TUESDAY:
Change Bedding
Vacuum
Dust
Wipe down Mirrors
Clean off night stand
Clean the floor of the closet
Everyday:
Make the bed
Pick up clothes
Put away toys
Clear off dresser
Take glasses to kitchen
Monthly (or as needed):
Launder bed skirt
Launder mattress pad
Clean out under the bed
Put winter/summer clothes in storage
It doesn't seem like a whole lot, and I am thinking, I must have forgotten some thing big! But I have walked through my room 6 times now thinking about that else I do... So if there is something I missed please let me know!!
Monday, April 16, 2012
The Better MELTED Butter Experiment
I finally did the butter experiment! I was planning on doing it Sunday evening, but someone made cookies with my room temperature butter... So I had to take some more butter out of the freezer.
The Question: What is the Best way to MELT butter in the microwave?
Hypothesis: Covering the butter will prevent the unwanted splatter.
The Problem: SPLATTER! When you microwave butter it heats unevenly which creates, super heated areas that pop and splatter.
The Experiment:
I took 3 sticks of butter, one at room temperature, one from the refrigerator, and one frozen.
I unwrapped the sticks to cut them in half. I wanted to use the wrapper for the experiment, like this:

The second half of the butter was then place in a microwave safe bowl and covered in wax paper. I cut a piece that was large enough to wrap the bowl. This created a cover to protect against splatter.


The Results:
Using the wrapper:
Room Temperature: Microwaved for 30 seconds, perfect melting with no splatter!
Refrigerator: Microwaved 30 seconds not fully melted,
so I zapped it for 10 more seconds. Now if I had taken the wrapper out and stirred the butter, it would have been fine, but I decided to zap it some more and it splattered all over!
Frozen: Microwaved for 30 seconds, and very solid still. In the picture below, you can see there is no melt butter!
So I zapped it for 23 more seconds (I got a pop and splatter with 7 seconds left.), and the butter still wasn't fully melted. But stirring finished the melting process.
Wax paper:
Room Temperature: Microwaved for 30 seconds, there was a little bit of splatter on the the wax paper, and I needed to give the butter a little stir to get perfectly melted butter.
Refrigerator: Microwaved 30 seconds, there was still some solid but stirring melted the rest, and there was no splatter on the wax paper.
I zapped it for another 30 seconds, and with 9 seconds left, POP! But it was covered!
Conclusion:
Wrapping the bowl in the wax paper will save you all the heart ache, the popping and splattering cause from the uneven heating in the microwave.
My Thoughts:
This was a fun little experiment. The idea of using wax paper, actually came from a little dispute Husband and I had. His idea was to create a water bath in the microwave using a bowl of water and a bag of water. I did not want to microwave the butter in a plastic bag for two reason, carcinogens and the mess! But I wanted to do something similar, so the wax paper cocoon came to be.
Also sorry about the photo quality! I need to pay more attention to my camera settings.
The Question: What is the Best way to MELT butter in the microwave?
Hypothesis: Covering the butter will prevent the unwanted splatter.
The Problem: SPLATTER! When you microwave butter it heats unevenly which creates, super heated areas that pop and splatter.
The Experiment:
I took 3 sticks of butter, one at room temperature, one from the refrigerator, and one frozen.
 |
| Here is the butter, R for Refrigerator, RT for Room Temperature, and F for Frozen. |
I unwrapped the sticks to cut them in half. I wanted to use the wrapper for the experiment, like this:

I moved the butter to the middle of the wrapper and then wrapped it back up like originally, minus one end. The opened end, I twisted the end and opened it a little, and placed in in a small microwave save bowl. This process of wrapping was done for the first half of the butter.
The second half of the butter was then place in a microwave safe bowl and covered in wax paper. I cut a piece that was large enough to wrap the bowl. This created a cover to protect against splatter.


The Results:
Using the wrapper:
Room Temperature: Microwaved for 30 seconds, perfect melting with no splatter!
 |
| Melted Room Temperature butter. |
Refrigerator: Microwaved 30 seconds not fully melted,
 |
| Refrigerator butter after 30 seconds of microwaving. |
so I zapped it for 10 more seconds. Now if I had taken the wrapper out and stirred the butter, it would have been fine, but I decided to zap it some more and it splattered all over!
Frozen: Microwaved for 30 seconds, and very solid still. In the picture below, you can see there is no melt butter!
 |
| Frozen butter, after 30 seconds of microwaving. |
So I zapped it for 23 more seconds (I got a pop and splatter with 7 seconds left.), and the butter still wasn't fully melted. But stirring finished the melting process.
 |
| After 57 seconds in the microwave, splatter and not fully melted butter. |
Wax paper:
Room Temperature: Microwaved for 30 seconds, there was a little bit of splatter on the the wax paper, and I needed to give the butter a little stir to get perfectly melted butter.
 |
| Melted butter from room temperature start, with wax paper wrapping. |
Refrigerator: Microwaved 30 seconds, there was still some solid but stirring melted the rest, and there was no splatter on the wax paper.
 |
| Melted butter from refrigerator, no splatter. |
Freezer: Microwave 30 seconds, and it was STILL SOLID! Look:
 |
| Butter from freezer still solid after 30 seconds of microwaving. |
I zapped it for another 30 seconds, and with 9 seconds left, POP! But it was covered!
 |
| Melted butter with out having to clean the microwave afterwards. |
Conclusion:
Wrapping the bowl in the wax paper will save you all the heart ache, the popping and splattering cause from the uneven heating in the microwave.
My Thoughts:
This was a fun little experiment. The idea of using wax paper, actually came from a little dispute Husband and I had. His idea was to create a water bath in the microwave using a bowl of water and a bag of water. I did not want to microwave the butter in a plastic bag for two reason, carcinogens and the mess! But I wanted to do something similar, so the wax paper cocoon came to be.
Also sorry about the photo quality! I need to pay more attention to my camera settings.
Saturday, April 14, 2012
What a Busy Week!
I got the week off and had these grand plans to finish a few things around the house.
Number 1, and the most important was getting my craft room into a usable status... Well, the shelves have been put up, and I have slowly been organizing. But it is still no where near ready.

Number 2, finish my sweater. I started a sweater in February. I have NEVER knitted a sweater before, and so I took a class. I was suppose to finish for the class... I need to finish one arm and then join the arms to the bodice and finish the yoke.


Number 3, finish baby socks for a friend. I did this one! Her baby shower was a few weeks ago and I cloudn't go and she had her baby this week! Look how cute they are!
 I also started a second pair for another friend. Her baby shower is in a couple of weeks, and so pictures after the shower. I don't want to ruin the surprise but this pair is my favorite so far!
I feel like I haven't done a lot around the house, or really done anything productive. I go back to work on Tuesday, and I haven't done the butter experiment yet! I still have tomorrow and Monday, but my vacation is gone!
Number 1, and the most important was getting my craft room into a usable status... Well, the shelves have been put up, and I have slowly been organizing. But it is still no where near ready.

Remember the before?
Now

Bodice

Sleeves (3/4 length)
Number 3, finish baby socks for a friend. I did this one! Her baby shower was a few weeks ago and I cloudn't go and she had her baby this week! Look how cute they are!

I feel like I haven't done a lot around the house, or really done anything productive. I go back to work on Tuesday, and I haven't done the butter experiment yet! I still have tomorrow and Monday, but my vacation is gone!
Monday, April 9, 2012
The Melted Butter Battle
Have you ever read The Butter Battle Book by Dr. Suess?
 |
| (from: http://www.teachpeace.com/drseussbutterbattle.htm) |
I love it. But my point is not about whether you eat your bread butter side up or not. It is about melting butter in your microwave...
How many times have you tried to melt butter in your microwave only to hear the sizzle and then POP! POP! So, drop what you are doing and dash to pop the microwave door open to prevent more melted butter spatter, all while knowing you are too late... The ceiling of the microwave is covered in liquid butter... Now if you are kitchen god or goddess already, you know how to prevent this or you are ready with a towel to wipe it up while it is still liquid. If you are like me, you just accept it as life and leave it until you are done with what you are doing.
I would like to assume you are like me if you are reading this...
So I googled it. I opened the first 10 hits I got from “how to melt butter in the microwave”. I found some good things, and some crazy things... But before we go into what I found, we first need to establish some definitions:
BUTTER: Is made from cream, from milk, from a cow! Not any of this marigine stuff or what have you. I am talk the REAL cream and milk fat calorie loaded good stuff!
SOFTENED BUTTER: done at room temperature for cookies or other baked goods. Still solid but when you press on it with your finger you leave an impression, and good for spreading on breads.
MELTED BUTTER: liquid butter, for dipping or for drizzling over fresh popped popcorn. If you cool this form (freeze or refrigerate) it never gets back to the creamy texture you had before.
CLARIFIED BUTTER: The process of seperating the milk fat and the water and salt from the butter. This creates a higher burn point or smoke point for the butter (from: Emeril Lagasse at the Food Network.com)
Here is what I learn this last week about melting butter in the microwave:
1. Use short, low temperature heating
2. cut the butter into smaller pieces (why did I not think of that before!)
3. STIR often
4. Leave it in the wax paper wrapper (DO NOT PUT FOIL IN THE MICROWAVE!)
And lastly, people aren’t talking about how to MELT butter in the microwave. 9 of the 10 sites gave me information on how to SOFTEN butter...
PS: If you want to soften butter quickly I suggest 1. Cutting into tablespoon sized pieces can letting sit at room temp until softened. Or 2. Places the amount of butter you need in between two sheets of wax paper and either roll or hit with a rolling pin until softened.
Next Monday, I will have the experiment with results for you!
Links to the 10 Google Results:
http://www.noobcook.com/how-to-melt-butter-using-a-microwave-oven-step-by-step-photos/
http://simplyrecipes.com/recipes/tip_how_to_soften_butter_quickly/
http://www.ehow.com/how_2105059_melt-butter.html
http://www.landolakes.com/TestKitchen/TipsAndTechniques/FAQ/Butter.aspx
http://www.foodista.com/technique/LWS4TC42/melting-butter-in-microwave#
http://www.realsimple.com/food-recipes/cooking-tips-techniques/cooking-uses-for-your-microwave-00000000042304/page2.html
http://bakingbites.com/2011/08/how-to-soften-butter/
http://www.thekitchn.com/quick-n-easy-ways-to-soften-bu-54814
http://wiki.answers.com/Q/How_do_you_soften_butter_in_a_microwave_oven_without_melting_it
Friday, April 6, 2012
TGIF!
Seriously! I always look forward to Fridays! It is my day off and the start of the weekend. This Friday is an important Friday, it is the Friday before Easter!
I know I am not going to get a chance to post before Easter so I thought I would take a moment to talk about Easter.
I am not a fan of the over commercialism of Holidays. I feel like most of the important ones have been taken over by this commercialism; Christmas, Valentine's Day, and Easter being the worst offenders.
Easter is important to me because of my believe in God and Jesus Christ. I am not one to talk religion; frankly, it scares me to talk to other people about religion. So, I am not going to preach to you or tell you to go to Church this Sunday.
But like all important Holidays, I do believe that they should be spent with people you care about. So for Easter this year spend it with family and friends. Take some time to be GRATEFUL for what you have, and to think about what Easter may mean to you.
I would love to hear your thoughts! Have a Great Weekend!
 |
| image from: http://www.thegatewaycenter.org/2012/03/chh-easter-shop-opens-tuesday-march-20/ |
Thursday, April 5, 2012
Thrifty Thursday
Sorry I didn't post yesterday. Honestly, I haven't worked in my craft nook for a few weeks... But I have next week off, so it is the NUMBER ONE thing on my to do list.
This Thrifty Thursday post is about GARDENING.
Gardening, is something that can save you lots of money. If you can get it to be bountiful... We have tried 3 time before. Last year, we got a couple handfuls of tomatoes.
This year we decided to go ALL OUT! My Man from the Palouse, made me raise garden beds. We even got plant starts this year.
Yes, it is cheaper and more thrifty to not have to buy lumber or soil for raised beds. But if you use pallets...
Yes, it is cheaper and more thrifty to do seeds, but if you are like me you get seeds to germinate and then... nothing...
At my husbands's work they get pallets all the time. He has built a few things with them because it is free lumber. Not great lumber, but lumber none the less.
A couple weeks ago we got a nice stretch of weather and my husband and his friend spent the whole day cutting up pallets, putting the beds together, adding compost and soil. I think they did a great job!

We don't just garden. We also compost. Even in our apartment, we have a worm compost bin. We started one last year. Which was very successful, just too small. This year we 'upgraded' from 10 gallons to 18.
You can put a lot in to a compost. Composting out side you can put more things in than when vermicomposting (worm composting). In our compost bin we put any vegetable food scraps, any vegetables and fruit that have 'past their prime', fruit scraps, shredded newspaper and all those credit card offers that come in the mail. We shred those and throw them in.
We have an old plastic container we keep on the counter, and when it is full I dump it in and cover the food with some of the bedding in the bin. It takes a few months to get nice compost, but it is not going to the landfills. We use red wriggles for our worm box. They are the best for composting inside. Worms are also cheap and they are prolific!
Here are a couple of site that I like for gardening help or vermicomposting:
GARDENING:
The National Garden Association--http://www.garden.org/
Square Foot Gardening--http://www.squarefootgardening.org/
Organic Gardening Learn and Grow--http://www.organicgardening.com/learn-and-grow
VERMICOMPOSTING:
Red Worm Composting--http://www.redwormcomposting.com/
Great site for Troubleshooting: All Things Organic--http://www.allthingsorganic.com/How_To/07.asp
Journey to Forever--http://journeytoforever.org/compost_worm.html
Tuesday, April 3, 2012
Lentils and A Recipe
Do you know how much I LOVE lentils?

NO?
Well let me tell you! First of all I live in the home of the National Lentil Festival (I think this is Pullman's only claim to fame... Minus WSU of course!) I look forward for this festival for two reason: The Nation Lentil Festival Chili and FREE LENTILS!!
Lentil are dirt cheap to begin with, but a free 2 cups!! That is enough to make this recipe!! By the way this recipe feeds 8!!
Lentils are a GREAT meat substitute for meals. Like for Meatless Monday, or if you just want to save some money and not eat meat at every meal. In other words it is a protein.
Lentil are like most dry legume, except you do not have to soak them over night. You can find then in your grocery store in the bulk section or with your other dry legumes.
We eat lentils all the time! And with the crockpot they are so easy! So, here is the recipe!

Not Just Another Lentil Chili
Ingredients:
2 cups LENTILS
HAM (optional, and you can put in as much as you want)
1 ONION
3 ribs CELERY
3 large CARROTS
2 cloves, crushed GARLIC
1 can DICED TOMATOES
1 tbsp CORIANDER
1 tbsp MARJORAM

Place lentils and ham in the bottom of the crock pot.

Chop your vegetables and toss those in.

Add the tomatoes and 3 to 4 cups water. Sprinkle the spices on top, cover, and set to low. Walk away and return 6 hours later to stir. Check to make sure there is still some water. Cook an additional 2 hours.

Now enjoy!
As always, here is a link to a printable recipe page.
Monday, April 2, 2012
April Showers bring...
Sun! It is the 2nd of April and so far it as been nice! Fingers crossed and knocking on wood it stay nice!!! But as the saying in Pullman goes... "If you don't like the weather, wait a minute." Please stay nice!!
It is Monday, and I am hoping this week is the opposite of last week. I didn't think it could get worse after being bitten by a dog, but it did!
But that is the past and I love this:
So in the present, I have a clean kitchen, because it is Monday! Oh, I love it! While I was cleaning, and wiping out the microwave for the umpteenth time due to melted butter splatter I thought, there HAS GOT to be a way to melt butter in the microwave, that is easy (3 buttons to press maximum) and prevents a melted butter spattered roof...
And so my next experiment has been found! I am going to working on this month and hope to have it to you soon!
I also have a great Lentil recipe for you so, look for that tomorrow for Homemaking Tuesday!
It is Monday, and I am hoping this week is the opposite of last week. I didn't think it could get worse after being bitten by a dog, but it did!
But that is the past and I love this:
 |
| From Pintrest: http://pinterest.com/pin/98445941824757096/ |
And so my next experiment has been found! I am going to working on this month and hope to have it to you soon!
I also have a great Lentil recipe for you so, look for that tomorrow for Homemaking Tuesday!
Subscribe to:
Posts (Atom)